
ONLINE ONBOARDING
Step-by-step tutorials to help you get started with OCLite faster.
Step 1: Global Configuration
Step 2: HRMS
1. HRMS Configurations – Manage Department
2. HRMS Configurations – Manage Designation
3. HRMS Configurations – Manage Job Classifications
4. Staff Management – How to Add New Staff?
5. Staff Management – How to Edit Staff’s Information?
6. Leave Setup – Step 1: Define Leave Types
7. Leave Setup – Step 2: Leave Entitlement Defaults
Step 3: Payroll
Step 4: Accounting
1. Accounting Configurations – Wizards
2. Accounting Configurations – Accounting Period
3. Understanding Chart of Accounts
4. How to Create and Manage Customer (Debtor)
5. How to Create and Manage Invoice
6. How to Create and Manage Receipt (Receive Payment)
7. How to Create and Manage Credit Note
8. How to Create and Manage Debit Note
9. How to Create and Manage Supplier (Creditor)
10. How to Create and Manage Receive Invoice
11. How to Create and Manage Self-Billed Invoice
12. How to Create and Manage Payment (Issue Payment / Payment Voucher)
13. How to Create and Manage Received Credit Note
Step 5: Pricebook
Step 6: CRM
Step 7: POS
Step 8: System Enhancements (Optional)
Global Configuration
1. How Do I Change My Username, Email, or Password?
2. How to Set Reports Template?
4. What Should I Do If I Forgot My Password?
HRMS
1. HRMS Configurations – Manage Approvers
2. Staff Management – Resign, Deactivate, Suspend & Unassign
PAYROLL
1. Manage Adjustments – Adjustment Purposes
2. Manage Adjustments – Add Adjustment Individually
CRM
1. Contact Book Overview (Leads, Accounts and Contacts)
3. Financial Transactions Overview
ACCOUNTING
Step 9: OC Lite Beginner Certification
Complete all onboarding modules to unlock and download your Beginner Digital Certificate.
Leave Setup – Step 2: Leave Entitlement Defaults
Leave Entitlements allow you to automatically calculate leave balances based on job classification, leave type, and years of service. This saves time by avoiding manual calculations for each staff.
? Where to Access HRMS
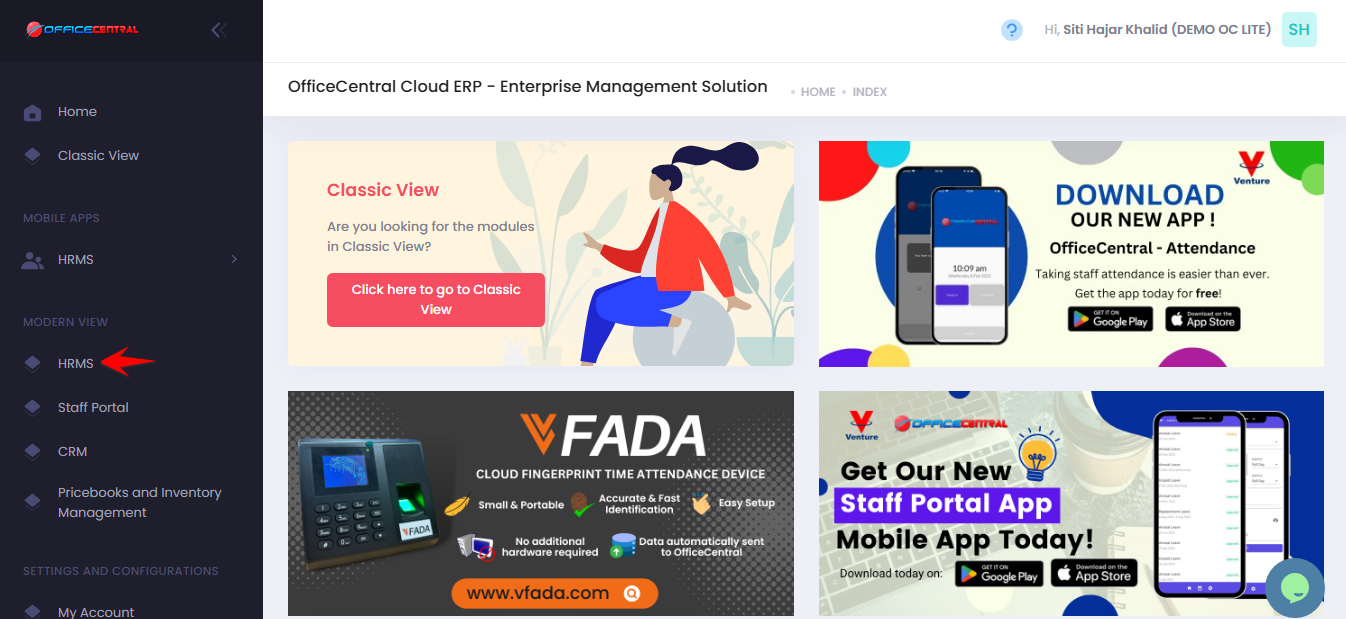
1️⃣ Where to Access This Function
-
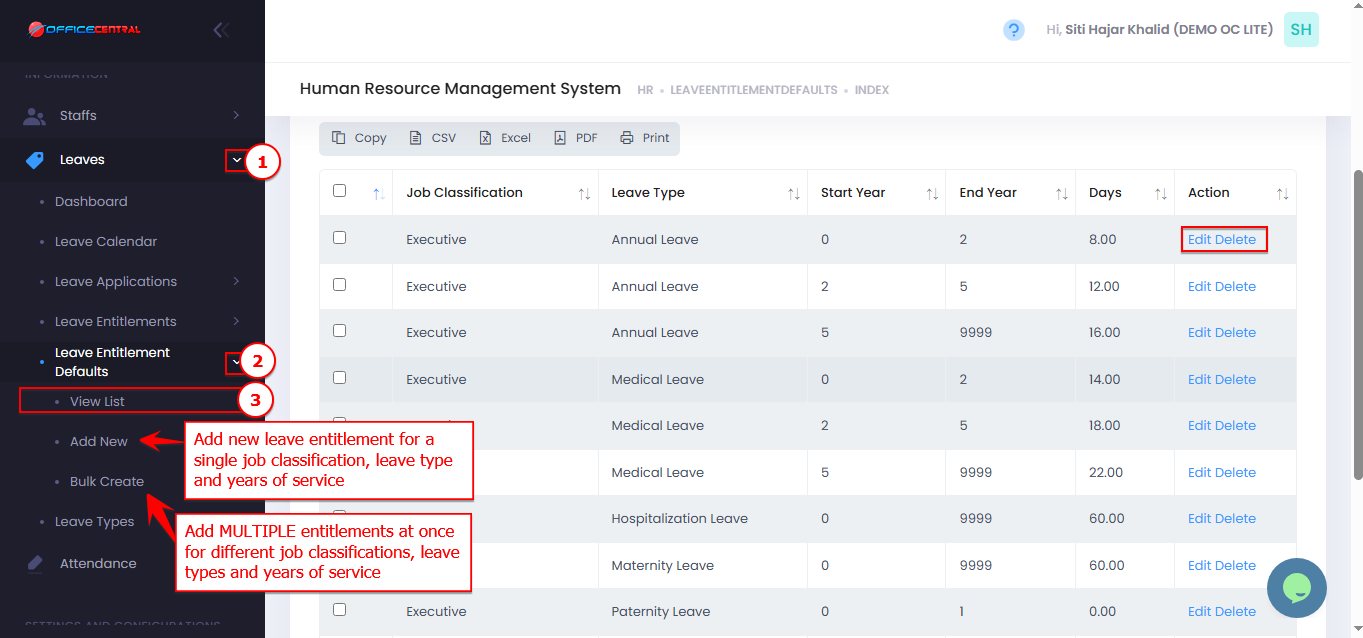
Go to Leaves → Leave Entitlement Defaults → View List
-
You will see a list of existing leave entitlements in your company.
| Button | Function |
|---|---|
| Add New | Create a new leave entitlement for a single job classification, leave and years of service |
| Bulk Create | Add multiple leave entitlements at once for different job classifications, leave types and years of service |
| Edit | Modify an existing leave entitlement |
| Delete | Remove an unused leave entitlement (cannot delete if already assigned to staff) |
Use the screenshot below to locate the buttons.
2️⃣ How to Add a Single Leave Entitlement
-
Click Add New to create a new entitlement.
-
Fill in the required information:
| Field | What to Enter / Explanation |
|---|---|
| Leave Type | Select the leave type this entitlement applies to (e.g., Annual Leave) |
| Job Classification | Select the staff classification (e.g., Executive, Manager) |
| Start Year | The starting service year for this entitlement (calculated from Date Joined) |
| End Year | The ending service year for this entitlement |
| Days Entitled | Number of leave days allocated for this period and classification |
| Limit Days to Bring Forward | • No limit: Staff has 12 unused days → all 12 can be brought forward • Cannot forward: Set Limit To = 0 • Limit to Certain Days: Set Limit To = 5 → only 5 days can be brought forward |
-
Click Save to store the new entitlement.
✅ Tip: Make sure the start and end year correctly reflects the employee’s years of service.
3️⃣ How to Add Leave Entitlements in Bulk
-
Click Bulk Create
-
You will see the bulk add screen.
-
Steps to add multiple entitlements:
-
Select Leave Types
-
Select Job Classifications
-
Enter Start Year and End Year for service period
-
Enter Days Entitled
-
Select No Limit / Limit To, enter amount of leaves that can be brought forward
-
Click Add for each row you want to create
-
-
Once all rows are added, click Save to finalize.
✅ Tip: Use bulk add if you want to assign multiple entitlements for different job classifications or leave types at once.
⚠️ Notes
-
Leave entitlements are calculated automatically based on the employee’s Date Joined.
-
Bulk Add is helpful when setting up multiple classifications or leave types for the same service period.
-
Always click Save after making changes to ensure the system updates leave balances correctly.